
Today I'm sharing a finished room- yay- the first fully finished room on this blog but ha, it is the toilet. It feels a little funny writing a whole post about fixing up the toilet room but this little space actually turned out quite interesting and is greatly improved. The house came with a beauty of a toilet area...lace curtains, wooden mirror and some pretty frieze:-) The moment I moved in the towel rack was taken down, the frieze pulled off and the curtain removed. The mirror was given a fresh coat of white paint and has found a spot in the nursery. However once the walls were empty, we realised what an awful state they were in- patched, peeling and dirty walls that needed some love.

With some paint it was starting to look a whole lot better. We purchased a little soap shelf , a thrifted gold mirror and a white bin, brush and toilet roll holder as well as a few thrifted decorative items. The door also has a scrabble toilet sign- for DIY instructions click here. We decided against having a curtain as they just collect dust and there is no way for people to see in through the window which is high and blocked by the fence.

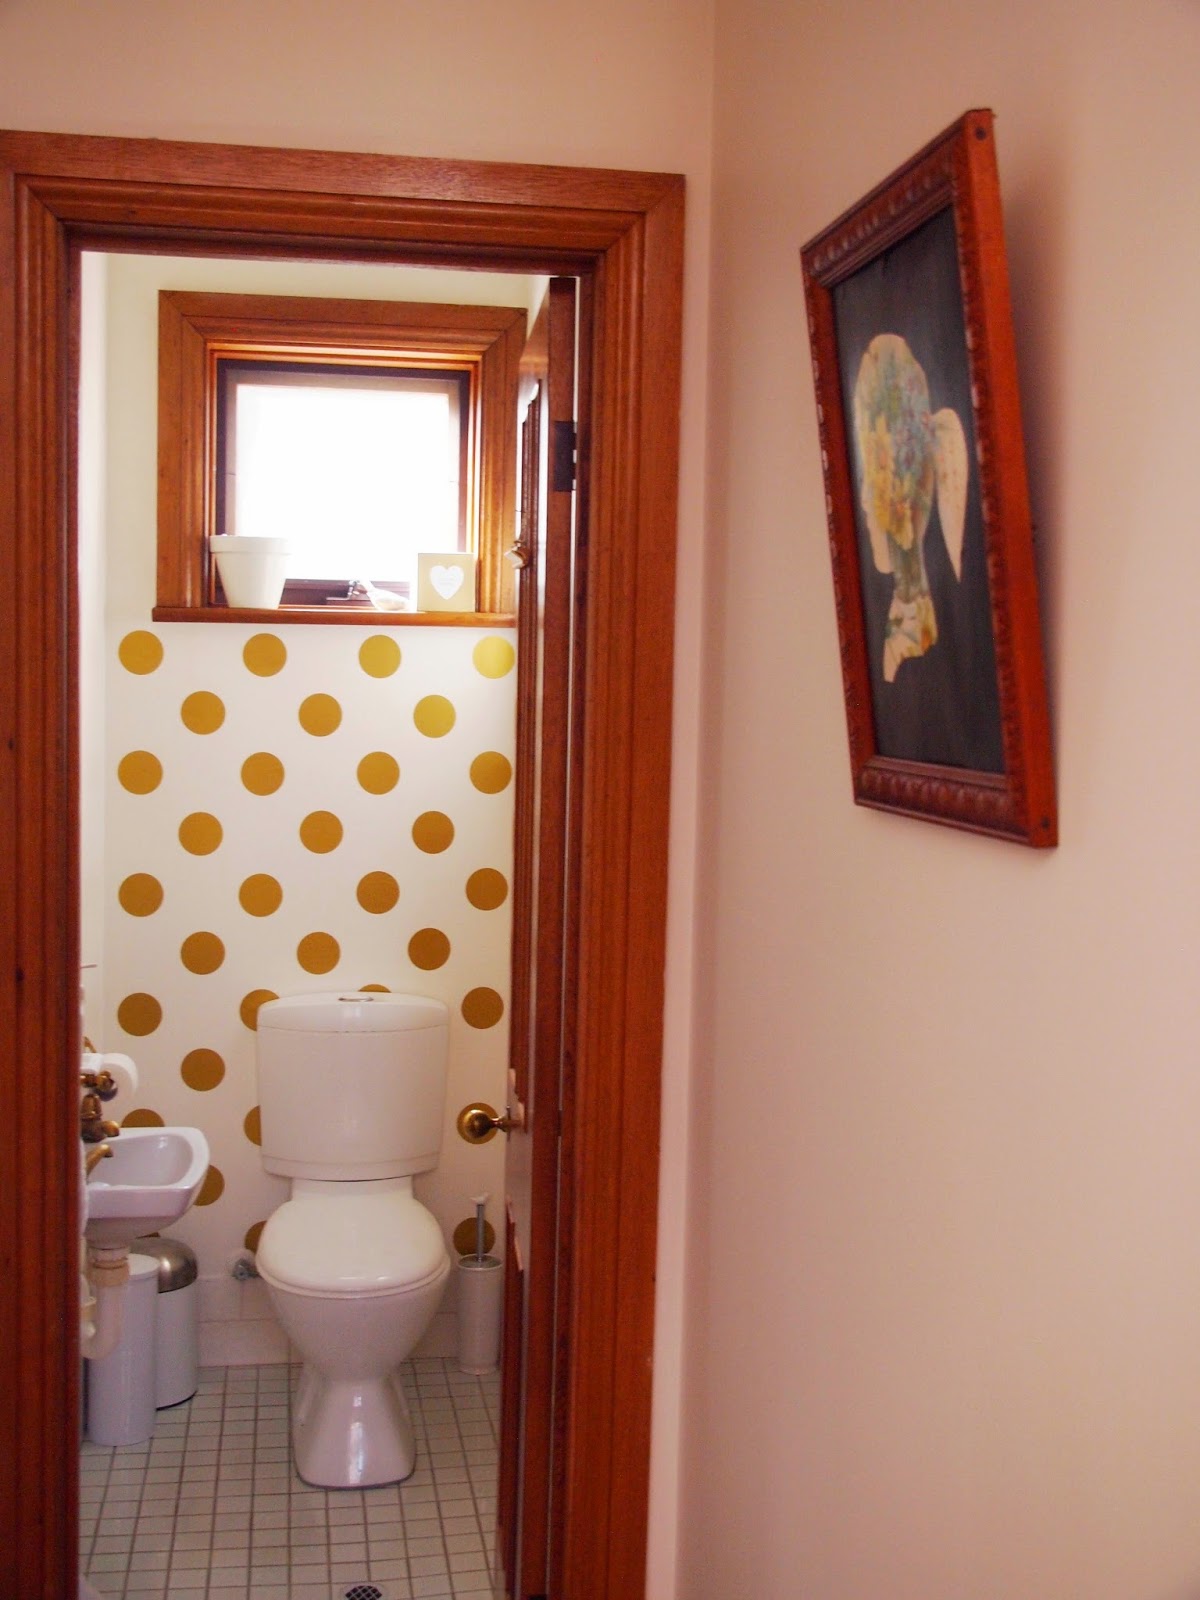
But white was just a little bit plain. Since this home is our hopefully long term home, I wanted to make this small space a bit more interesting and special. I order some gold wall decal stickers from 'Walls need love' and they were the extra little touch needed. I used blue tac to work out how to place the stickers and left it for a few days to see if I warmed to the dots. When husband first saw it he laughed and said it looked like a kindy kid had done it but I decided it was probably just the bluetac look...well I hoped that was the case.

Now attaching these dots (which are really just large stickers) was fairly easy but involved a fair bit of measuring. It was really important that the dots were even before we peeled them off and stuck them down as although they are removable, the more they are fiddled with, the less good they look.We used a small ruler to make sure the space between the dots were even and thankfully circles are a bit more forgiving than squares and lines probably are. A special way that saved us some measuring was using masking tape to ensure the dots all lined up properly and this technique was possible on every second row.

In total this small wall took dad and I about an hour to lay, though the hardest part was probably getting into the smaller spaces with my increasingly large baby belly. If you look closely at some of the dots they are slightly crinkled and showed up imperfections in the wall. However when all the dots were laid down, you really don't notice the imperfections.


It's funny that this space is the most out there in our house so far but I'm feeling more adventurous now I have an unusual room. I love having a house which I don't think I'll be moving from anytime soon and can just personalise and have fun with. And if one day if I change my mind, the dots should be pretty easy to remove.
Lisa x
* I made the artwork in the hallway, for a diy how to link click here.
The gold dots look great. The bathroom looks way better than it did before.
ReplyDeleteThanks, I know! I love it when small cheap additions make all the difference :)
DeleteLove! Such a fun way to brighten up a small bathroom.
ReplyDeleteAdorable! What a cute way to brighten up a powder room! Thank you for sharing on Whatever Wednesday on Thank You Honey!
ReplyDeleteLove the gold dots!!!!!
ReplyDelete