Showing posts with label laundry. Show all posts

Friday, 16 May 2014

A few finishing touches.

We're making steady progress on the house everyday and each change is making it feel like our home more and more. It's almost a year now since we bought the house, although only 6 months since we moved in and we only started working on the house in January.  Anyway it's clear, I'm a renovation addict and I just can't stop making more and more changes.
If you're a regular reader of this blog, you'll remember our laundry turned from this to this...
Needless to say, we were pretty happy with the fresh new look. However the walls were looking a bit too empty so I wanted to add some art and extra shelving. While we would like to have big built in shelving in the future and perhaps include another toilet in this room, I wanted to use items I already had (or could source cheaply) to make the laundry a bit more homely.

1: ART
Any kind of art probably works in a laundry but I decided to go with laundry themed art. The frames were from kmart for $3.50 each and the prints came from this post . I downloaded the images and printed them with a matte finish for $1.20 each so altogether the artwork came to $9.40- not too bad for adding a little bit extra to the laundry room. I had tried thrifting for frames for about a month or so but matching white frames are hard to come by and when they are so cheap from the store, I didn't feel it was worth the effort to paint the frames. It's amazing what lovely free downloads are around and I really like how the colours of these prints connect with the existing mint/white colour scheme of the laundry.
 2: SHELVING
I am very fortunate to having some fantastic carpenters in my family but whenever I can thrift the perfect item, I do that over taking up their time and energy. I came across a pine shelf at a garage sale in the country about a year back for $10 and knew I could find a good use for it. After giving it a coat of primer and two coats of white enamel, it was in our bedroom on the wall holding up some jewellery. However as the master bedroom has had a bit of a makeover recently (will share soon, I just am waiting for the right light to capture some pretty snaps), I had removed the shelf and realised it would be great extra storage in the laundry and create some visual interest for a very high blank wall.


There is still potential space for more artwork and other accessories but I like it so much more already. Our laundry in our old home had a blue theme so the peg basket shown above is actually our old blue peg basket given a few coats of white paint- recycling whenever possible :)

And speaking of art, I just had to share the newest photographic addition to our art collection. Our darling dog Maisy is a bit of a cutie and when I found a deal online for a $9 dog photo shoot that came with an 8 by 12 print, I just jumped at the chance. I love a good photograph and somehow we'd neglected to print any of Maisy in the last three years. She wasn't quite the perfect model for her little snaps but we ended up with a truly adorable print of her that is now proudly on display in the lounge room, she needs her few minutes of fame and attention before baby comes in 6 short weeks and the baby photos start to fill the walls. I'm stoked with the end result, definitely worth $9!


It will need to move soon from its current location as when the gas heater is turned on, the top tends to get too warm to leave things on- and I don't want to wreck this picture :)
 Lisa x
P.s My friend Kirsty asked me to share some tips on fixing up secondhand furniture on her blog this week.

Thursday, 24 April 2014

Small budget changes to the laundry.

I am pleased to show another room reveal today of some pleasing changes to our laundry. The existing laundry was a dirty and unappealing room. I know no matter how pretty my laundry becomes, it will always be just a laundry, but with a baby coming I will be washing a lot more, and it should be a pleasant place to be.With a very small budget to play with it wasn't possible to gut the laundry and get a new trough and cabinets but I tried to make the space more livable for the now. I guess you could call this makeover a stage one makeover as we save for a future makeover that will hopefully include adding an additional toilet to this room. Let's have a look back at what it looked like when we bought it. There were sunflower tiles, dirty flaking walls and a scratched worn blue trough.
Since we had a lot of taubmans sea bubble paint leftover from the bathroom and nursery, I decided to use it in the laundry too. It is such a calming, light, fresh colour that I could see it working well.
We began by removing the sunflower tiles (don't get me wrong, I like sunflowers but these just weren't working for me). Once they were removed it was clear that the wall needed a heck of a lot of patching and cleaning before it was ready to paint. In fact the whole laundry demanded a deep and through clean. Once painted the room was starting to look a lot better.
We then used caulk to fill in the gaps in the laundry bench and cut out a shelf in the underneath cabinet so the laundry had somewhere to store a washing hamper full of dirty clothes.


The blue trough looked terrible with the new walls so it was painted in two coats of enamel white paint and looks like a completely different trough.
The laundry was then ready for a little styling and I added a few thrifted green tins as well as painting my old peg bucket the same white colour as the trough ( it was originally a dark blue).
The ironing board was mounted on the laundry room door using a cheap hanger from mitre 10 and this is great for keeping it out of the way.
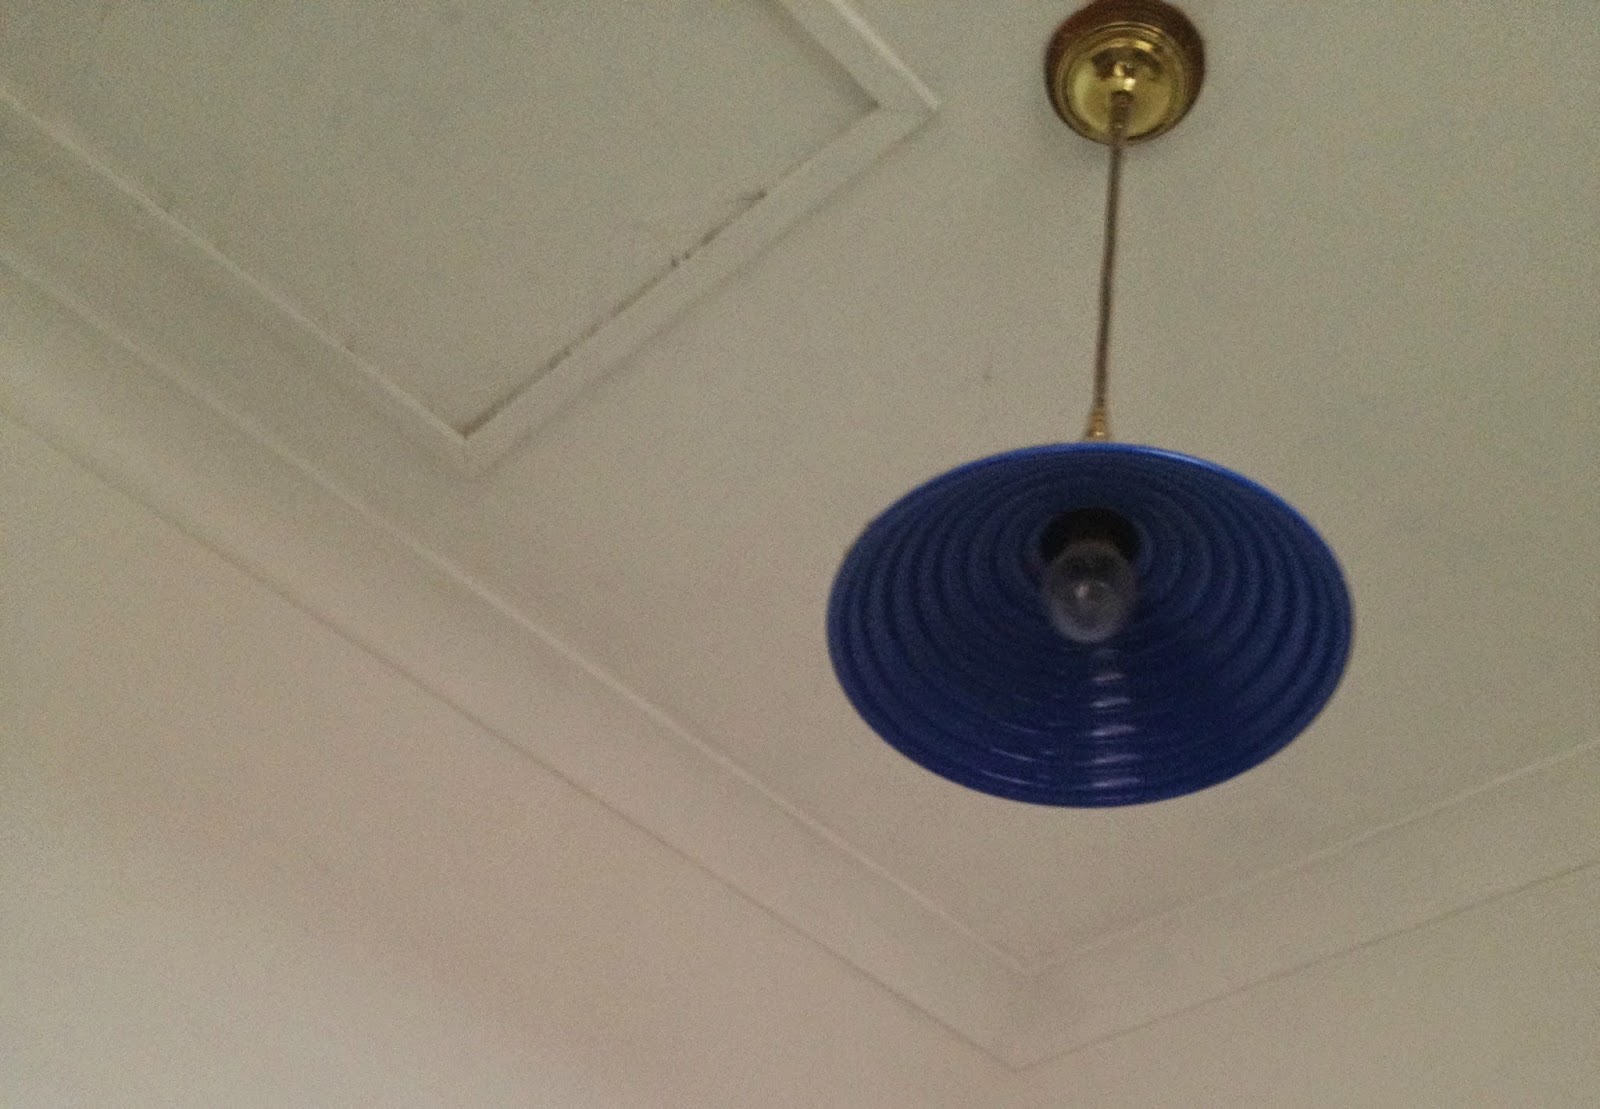
We also changed the lighting which greatly affects the feel of the room.  While the existing blue pennant was quite industrial and funky, the blue was really clashing with the newly painted seabubble walls. I bought a lampshade on sale and just love how the new lamp shade casts web like shadows all over the walls.
before
The final task I did was to sew a little curtain for the laundry cupboard so you can no longer see the clutter behind it. To make the curtain I purchased some green fabric (on 30% sale at spotlight). The space between the cupboard was 54cm so I used 80cm of fabric. I've never sewn curtains before but this fabric was easy to line up due to the linear pattern. I used heat and bond lite (cut into thin strips) to hem the sides of the fabric. To use this you simply iron down the heat and bond lite. Then peel off the top and the two fabric sides will stick together once ironed. This made it easy to get the hem straight and then I used the sewing machine to stitch down the hem except for the top. I double measured the length and hemmed the top, leaving a gap big enough to threat through some stretch plastic. I used hooks to hang the fabric and then had a cute little curtain which really completed the neat look of the laundry.
As we used supplies that we already had, I only had to purchase the lampshade, curtain fabric and ironing hook which made this makeover cost less than $80 for the whole update. While the laundry is already a massive improvement there are still a few plans on the horizon.
Future ideas:
-Add some more artwork.
- Look at cabinet options for above the machine/trough
- Possibly buy a dryer (a baby is going to make a lot of extra washing)
-Maybe one day add a toilet to the room so our house has a second toilet.

Washing just got a whole lot more enjoyable :)
Lisa x

Saturday, 13 October 2012

The evolution process: laundry.

Only recently have I decided to spruce up the laundry a bit. For a while it was just a space to store bits and pieces and was not a space worth photographing.
I've shared how I built this shelf, then made this bench, created this new little area and then a new ironing board cover.
2010: This isn't the best before photo but basically it just empty and lifeless. There was nothing at all in the laundry except our machine, the wash basin and some plain white cupboards. Simple, but not my style.
Now:
 My drying rack and new ironing board cover.
 The white shelves with wire storage on top and a thrifted hook added to the side to hold bags and maisy's leads. You might also notice the peg bag I made from a teatowel.
For a splash of colour I put up a pop art oil painting copy that I bought during a holiday in vietnam. I also finally found a good spot for the lamp shade I thrifted. There is also our hand made doggy door as we had to work out how to make a doggy door that went through the regular door and also the fly screen.

My laundry is now feeling a lot more homely and full of life. I am really enjoying the changes. While the small brown tiles aren't that great, it's a huge job (and very costly) to retile the bathroom, toilet, laundry area and for now I'm just going to embrace them and enjoy the laundry as it is.
Lisa x

Wednesday, 10 October 2012

New ironing board cover.

The laundry has overgone a lot of changes and I knew an easy update was to change up the old ironing board cover. I used to have a large ironing board but found a little one on a garage sale for a few dollars. I like it so much more as it doesn't take up much room and it is so easy to get out and set up anywhere. However the cover was pretty old and definately not my taste.
I'm still learning how to sew well so I decided to use the existing cover and create my new cover around it. This was easier for me than working how how to thread the string and work out how to keep it in place.
You will need:
an existing ironing board cover
a sewing machine
material
How to:
I left the padding on the board and made the cover to go on top.
First measure the material so there is about a 2 cm boarder around the edge.
Pin it in place around the existing cover.
Then sew the material in place and you have your new cover.
The fabric, which was gifted to me by my best friend's mum, is much more to my taste and no longer full of stained patches. This DIY only took about 15 minutes and already makes me feel slightly better about ironing, although I'm still not that into ironing!

Sunday, 7 October 2012

Back door organisation.

I made a great entrance way but I don't always enter through the front and thought I should create a little
area at the back of the house for all my stuff when I get home.
I've already shared my new bench but this is the result of finishing off the can of spray paint and a little more thrifting:
 

I had this fantastic shaped pineapple bowl but the wood colour didn't quite work in my home. Some primer and 2 coats of spray paint later and I had the perfect key/loose items bowl.


A thrifted mirror. It was hidden in the back corner of a garage sale but with a little bit of TLC I removed the stickers covering the front and now I can make sure I look okay before heading out the door.


I also had an old crate which was a bit worse for wear. With some primer and 2 coats of spray paint again, it was ready and fits nicely under my little bench. I now have a little spot to hold my green bags for grocery shopping.

Total spent: $29 bench, 50c crate, $1 pineapple and $4 mirror = $34.50
Now I feel all organised and ready to head back to work with everything in my back area having a place.

Friday, 5 October 2012

Thrifted table to bench.


my very cute model
I got a table from a recent garage sale for $3 and knew I could turn it into something wonderful. I had many ideas and this is how I've ended up using it.
Before: lots of potential with the pretty legs.
With a quick sand, a coat of primer and two coats of blue spray paint my table was transformed- bermuda blue for anyone interested. I choose this blue because our kitchen benches are a similar colour and the laundry/ back door is right near the kitchen.

The room that I am currently focusing most of my attention on is the laundry/ back door area and I decided that my little table was going to become a bench.
In order to do this I measured the table and cut some plywood and foam to size.
Then I put the plywood on top and drilled 4 holes through the plywood, table which will assist me when joining the top to the table.
holes drilled
plywood and foam on.
I choose a white upholstery fabric as I had been given it by a friend and I thought it fitted nicely with the warm bermuda blue colour. 
Turn the plywood upside down so the screws (in the drill holes ) were sticking up and the foam and material were underneath. I stapled around the edge. This is pretty easy, though the corners always create a bit of a challenge and need extra care.
Then turn the upholstered plywood around and connect the screws with the drill holes.
Fit it together and there you have it, a cute little bench from a table.

In total this project cost me free primer (as there was some in the shed when we moved in), $11 spray paint, $3 table, $15 foam and plywood and free material. For $29 I'm pleased with my new bench. It's the perfect colour for the area and will get plenty of use.