Showing posts with label art. Show all posts

Thursday, 22 January 2015

Henry's dedication.

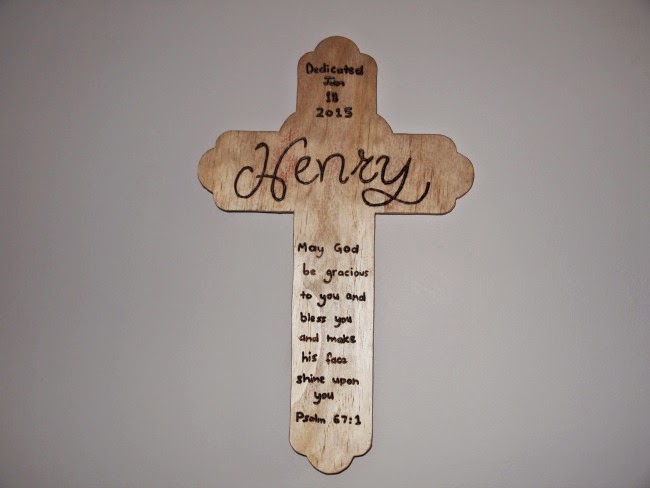
My husband and I are practicing Christians and had a dedication ceremony for our son, Henry, recently. A dedication is a chance to declare our intent to raise our child as a Christian. It was a special day for our family and I wanted to make Henry a little cross to remind him. I used an existing cross that I had and my dad helped to cut out the cross shape once the lettering had been done.

To make a cross (or other shape) similar to this you will need:
a pencil
a cross shape template
a piece of plywood
a soldering iron
a fretsaw (or someone kind to cut it out for you)
sandpaper


Once I had decided what I wanted it to say I wrote it out in pencil. I have average handwriting but it is a special handmade item for Henry from me. Once I was happy with the text I used a soldering iron to write over the pencil and burn the text into the wood. Since the verse I'd chosen was quite long it took a few hours but is a fairly therapeutic peaceful activity to do while baby sleeps.

My dad cut out the shape for me and we added a hook on the back to hang it with.I hope we can use the cross with Henry when he's older to discuss the meaning and reason behind his dedication. I've also included a few other photos of decorations from the day. They're fairly basic decorations as I'm time poor at the moment but added to the special feel of the day.


Lisa x

Friday, 23 May 2014

Black gallery wall and a look around the lounge room.

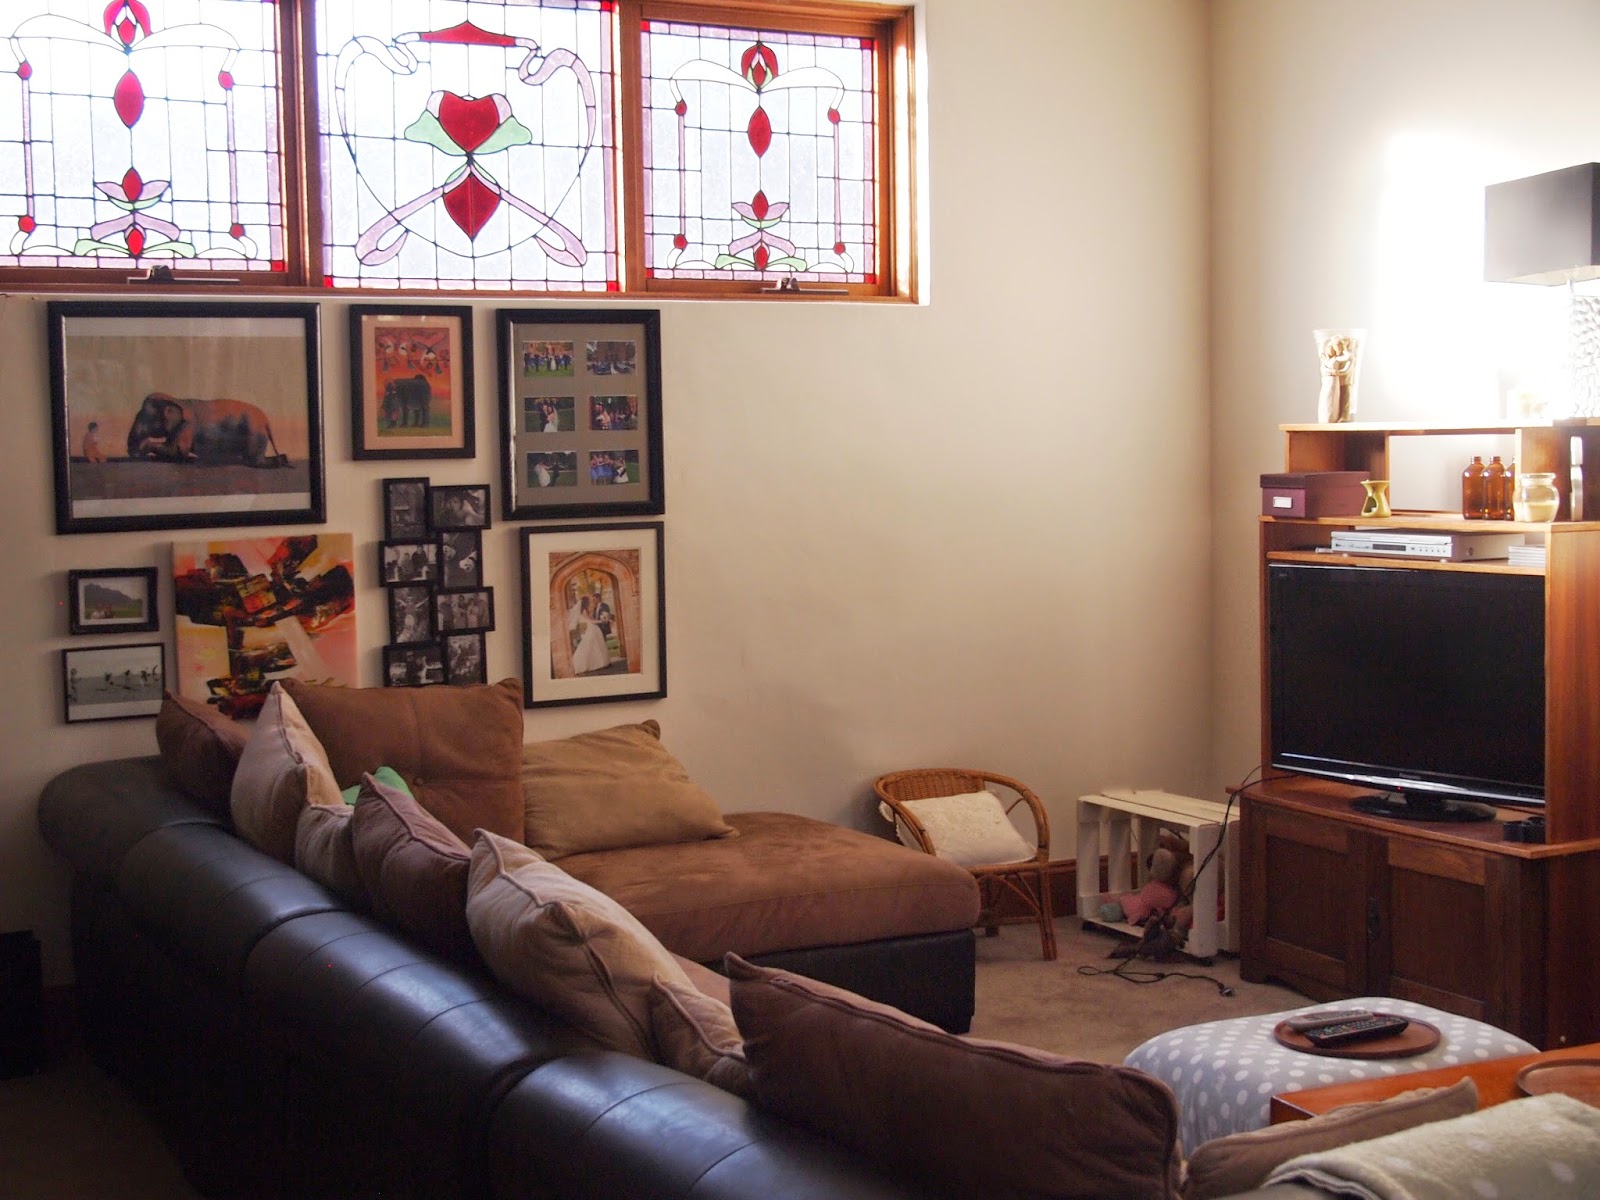
Once pictures are put on the wall in a home, it starts to immediately feel more homely. I'd been planning a black gallery wall for a while now and the frames had been on a pile in the lounge room, taking up space, with me hoping that no one would step on them or smash the glass.
The lighting in the lounge room is a bit tricky as our house is built around a large glass atrium so there is a bit of glare during the day but not that much (see below photo for the reflections).
A few of the frames were actually brown  (the elephant picture and the top right picture) but with two coats of black, they looked like they'd always been black and that saved me the $ of buying new frames and reframing the artwork. I really just collected every black or somewhat black framed piece of artwork/photograph that I own and worked out how best to arrange them. These pieces are all special to me and I'm thankful to be able to see them lots. The elephant picture is actually hand sewn by some people in Vietnam with disabilities and the painting below it was hand painted in Vietnam.  The hippo painting was purchased in Zanzibar and the photos are all special snaps, including a few from our wedding.


It creates a nice focal point in our lounge room and something for guests to look at when they visit. While putting together a gallery wall can be a bit frustrating, we feel like the layout now is working for us. Our lounge room (which is a large room including the dining room and kitchen) is becomming more homely. I am a particular fan of the bird pillow too which was thrifted from a garage sale for $1. Apart from potentially adding a few more accessories to the television cabinet, I feel like this area is complete...although I am dreaming up some special shelving for an area of the wall...there are just too many great ideas and sources of inspiration out there! And just to show you the big change, here's a little before and after...

This probably isn't the best before and after snap ever as the lighting was much better in the before photo and it is hard to tell that the walls were actually a little apricot colour and now are white. However what you can tell from this after picture is that our evolving furniture and items are really starting to make the place feel more like us.. I'll just need to keep working on my photography skills!
Lisa x
PS for details sake:
the couch - harvey normans (4 years ago)
Every other item thrifted

Friday, 16 May 2014

A few finishing touches.

We're making steady progress on the house everyday and each change is making it feel like our home more and more. It's almost a year now since we bought the house, although only 6 months since we moved in and we only started working on the house in January.  Anyway it's clear, I'm a renovation addict and I just can't stop making more and more changes.
If you're a regular reader of this blog, you'll remember our laundry turned from this to this...
Needless to say, we were pretty happy with the fresh new look. However the walls were looking a bit too empty so I wanted to add some art and extra shelving. While we would like to have big built in shelving in the future and perhaps include another toilet in this room, I wanted to use items I already had (or could source cheaply) to make the laundry a bit more homely.

1: ART
Any kind of art probably works in a laundry but I decided to go with laundry themed art. The frames were from kmart for $3.50 each and the prints came from this post . I downloaded the images and printed them with a matte finish for $1.20 each so altogether the artwork came to $9.40- not too bad for adding a little bit extra to the laundry room. I had tried thrifting for frames for about a month or so but matching white frames are hard to come by and when they are so cheap from the store, I didn't feel it was worth the effort to paint the frames. It's amazing what lovely free downloads are around and I really like how the colours of these prints connect with the existing mint/white colour scheme of the laundry.
 2: SHELVING
I am very fortunate to having some fantastic carpenters in my family but whenever I can thrift the perfect item, I do that over taking up their time and energy. I came across a pine shelf at a garage sale in the country about a year back for $10 and knew I could find a good use for it. After giving it a coat of primer and two coats of white enamel, it was in our bedroom on the wall holding up some jewellery. However as the master bedroom has had a bit of a makeover recently (will share soon, I just am waiting for the right light to capture some pretty snaps), I had removed the shelf and realised it would be great extra storage in the laundry and create some visual interest for a very high blank wall.


There is still potential space for more artwork and other accessories but I like it so much more already. Our laundry in our old home had a blue theme so the peg basket shown above is actually our old blue peg basket given a few coats of white paint- recycling whenever possible :)

And speaking of art, I just had to share the newest photographic addition to our art collection. Our darling dog Maisy is a bit of a cutie and when I found a deal online for a $9 dog photo shoot that came with an 8 by 12 print, I just jumped at the chance. I love a good photograph and somehow we'd neglected to print any of Maisy in the last three years. She wasn't quite the perfect model for her little snaps but we ended up with a truly adorable print of her that is now proudly on display in the lounge room, she needs her few minutes of fame and attention before baby comes in 6 short weeks and the baby photos start to fill the walls. I'm stoked with the end result, definitely worth $9!


It will need to move soon from its current location as when the gas heater is turned on, the top tends to get too warm to leave things on- and I don't want to wreck this picture :)
 Lisa x
P.s My friend Kirsty asked me to share some tips on fixing up secondhand furniture on her blog this week.

Friday, 21 February 2014

Nursery gallery wall.

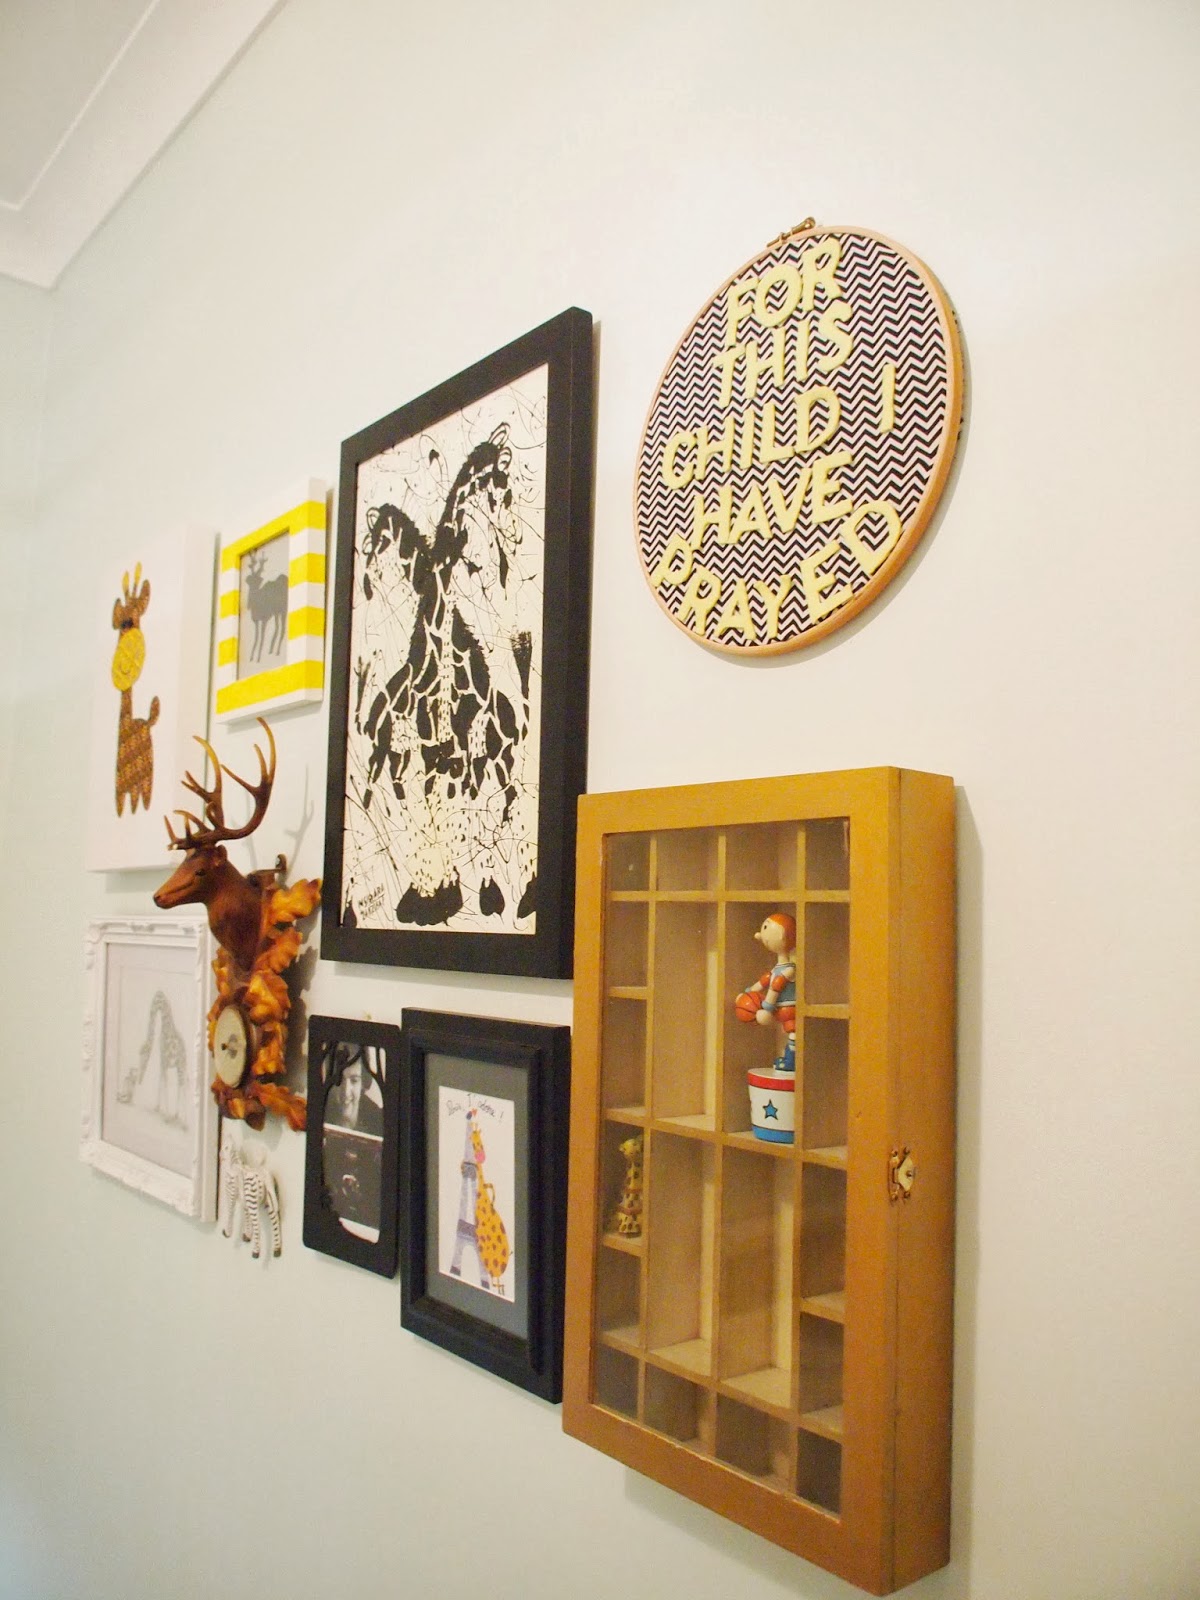
I wanted to have a gallery wall in the nursery that tied in my colours of choice (green and yellow) and some cute art I'd collected over the years or made myself.  Finally I had collected enough items to create a display. While all the artwork is really just a mishmash of pictures I like and thought were pretty cute. I really love being able to see all these beauties together and not have them hiding away around the house.
The deer head, zebra and box were thrifted while I lived in the country. The giraffe and Eiffel tower and giraffe and cat drawing were gifts and the smaller black picture frame and black and white giraffe were bought while travelling. I have already shared how I made the embroidery frame art, sewn giraffe picture and deer print and you can click the links to see how to DIY your own.
It's great to have a little gallery wall up and giving the room some charm and visual interest. The whole process of hanging the frames involved a lot of practising layouts on the carpet and a lot of measuring prior to any nailing of hooks. The only things to find now are a few more cute knicknacks for the shadowbox. So far it houses a little Eiffel tower giraffe and a basketball man so hopefully I can find a few more cute little things to fill the shelves (although I'll probably leave a few empty shelves for any special little gifts the bub might get or collect while growing up). I only have one more blank wall to add features too and then the walls will be finished. Then the process of buying/thrifting all the baby stuff will begin so the bub actually has the necessities.  Here's hoping thrifting lots of these items will be easy!
Lisa x
P.S I'm linking up with
Live Laugh Rowe
A Glimpse Inside
Bloom Designs

Thursday, 6 February 2014

Let's get some art up.

There's nothing much in the future nursery yet so I thought I'd make a few little art pieces for the wall. After all I want to make lots of the nursery features since handmade items are just more special.
I really wanted to praise God for the baby inside of me in some nursery artwork. A favourite verse of mine that has encouraged me is from 1 Samuel 1:27 " For this child I prayed, and the LORD has granted me my petition that I made to him."
I decided to make some artwork that reflected this using a thrifted embroidery frame, fabric from a thrifted top and some felt I had lying around using the technique I used for the felt artwork in our hall.
It's just a special little something for the new room. I am considering hand sewing it in place later but for now the glue is holding it fine :-)
Also in 2008 I went for a holiday with two friends to Phuket, Thailand and had an incredible time. I bought a stitched giraffe tshirt as I have a thing for giraffes. When clearing out my wardrobe (to just leave clothes that fit my increasingly growing belly), I realised that the giraffe would look awfully cute framed and in the nursery.
For the frame I bought a cheap canvas frame from cheap as chips for $5 and removed the canvas. Then I used a staple gun to attach the front of the t shirt. It is really important that the material is pulled tight. Now I have some more cute artwork for $5 and have turned a t shirt I was never going wear into something special.
 Now I only need to get a few more pieces of nursery art together  and work out the layout before I  can create a little gallery wall in the nursery.
Lisa x
P.s I'm linking up with 
We Like To Learn As We Go
Someday Crafts

Monday, 23 December 2013

Felt artwork.

I am always a fan of having powerful and inspiring quotes throughout my house and wanted to have a biblical quote  in our main living room. After looking through my craft supplies I was inspired to create a quote artwork using felt. 
To create this artwork you will need:
A stencil
A texta
Felt in a range of colours
A frame and canvas.
White and grey paint
Sharp scissors
PVA glue
Trace the letters onto the coloured felt and cut them out by hand. I used a range of colours I had on hand and rotated them randomly so there isn't any pattern in the writing. All I tried to do was make sure I used each other about the same amount of  time. The canvas was a lovely apricot colour so it was in need of some paint.
Once this was completed I painted the canvas with two coats of grey paint and the frame( which was previously plain wood) with white paint. This fabulous canvas and frame combo was $2 from a garage sale but the cheap shops sell canvas' for hardly anything. I then arranged the letters in place and glued them on with PVA glue.

And there you have it, my new quote artwork. I'm quite chuffed with it and love the even sizing of the letters. However I am still considering getting some blue and pink felt and swapping some of the letters to make the overall look even brighter and more colourful. For now though I'm just going to enjoy it as it is and use it as a daily reminder.
 Lisa x
P.S I'm linking up with

Flamingo Toes
C.R.A.F.T.

Saturday, 8 September 2012

Cameo picture.

So I found this pretty frame in my thrifting adventures and thought the frame on this picture was simply the best. I liked the picture but I knew I could turn it my something okay into something beautiful.
All I needed was a printer, some contact, a glue stick and black paint.

How to:
1.I searched for a silhouette picture on the net and copied it to a word doc.
2.Enlarge the picture to A4 size before printing.
3. Cut out the silhouette and glue it to a piece of contact.
4. Cut out around the outline and you will end up with a contact sihlouette.
5. Remove the picture from the frame and placed the contact picture in the centre.
6. Paint the whole picture black with acrylic paint and let it dry.

7. Peel back the contact and put the picture back in the frame.


I reframed the picture and there it was. Ain't it pretty?

So easy and so effective. I was so pleased with the end result that I've actually started 2 more projects using the same technique.