Showing posts with label garden. Show all posts

Tuesday, 18 February 2014

Phase 1: Planting some plants in the atrium.

The atrium is a central space in our house that you can see out to from all angles. It helps create really beautiful lighting but has been neglected since we moved in except for our 'new' outdoor furniture, some cute ways to display outdoor plants and making the atrium dog friendly.
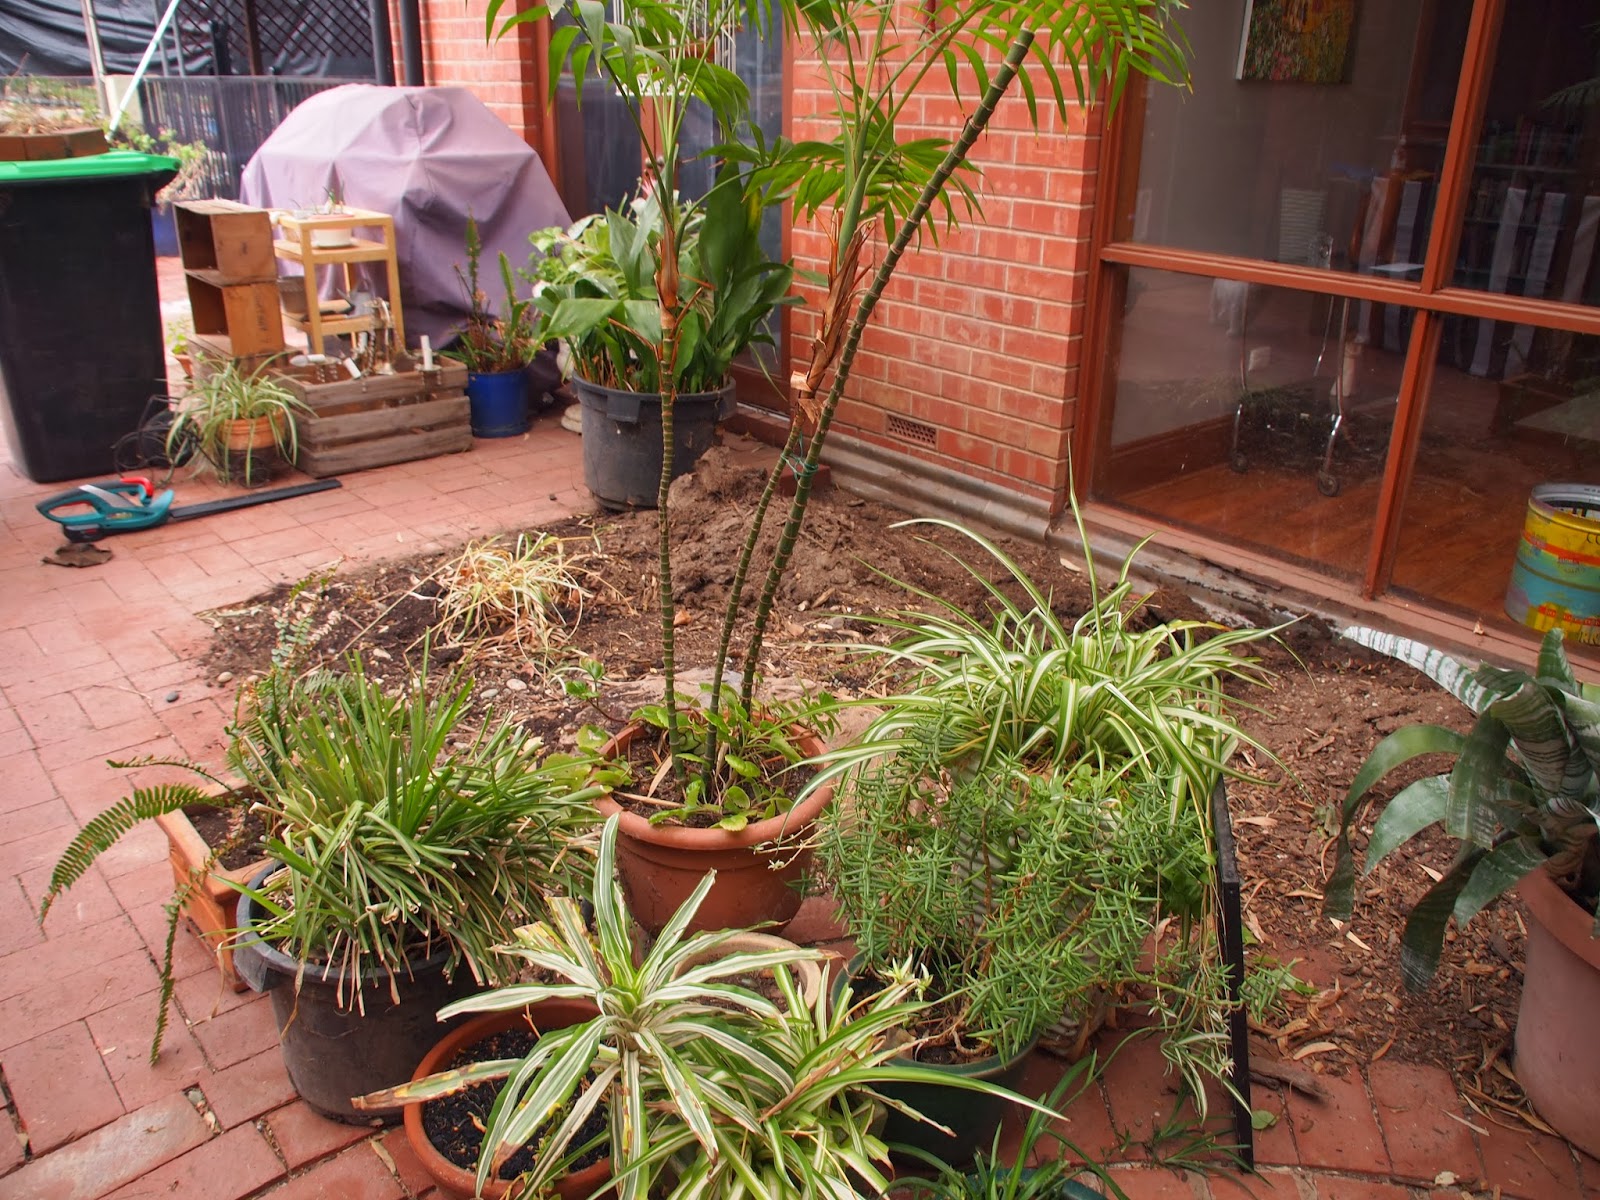
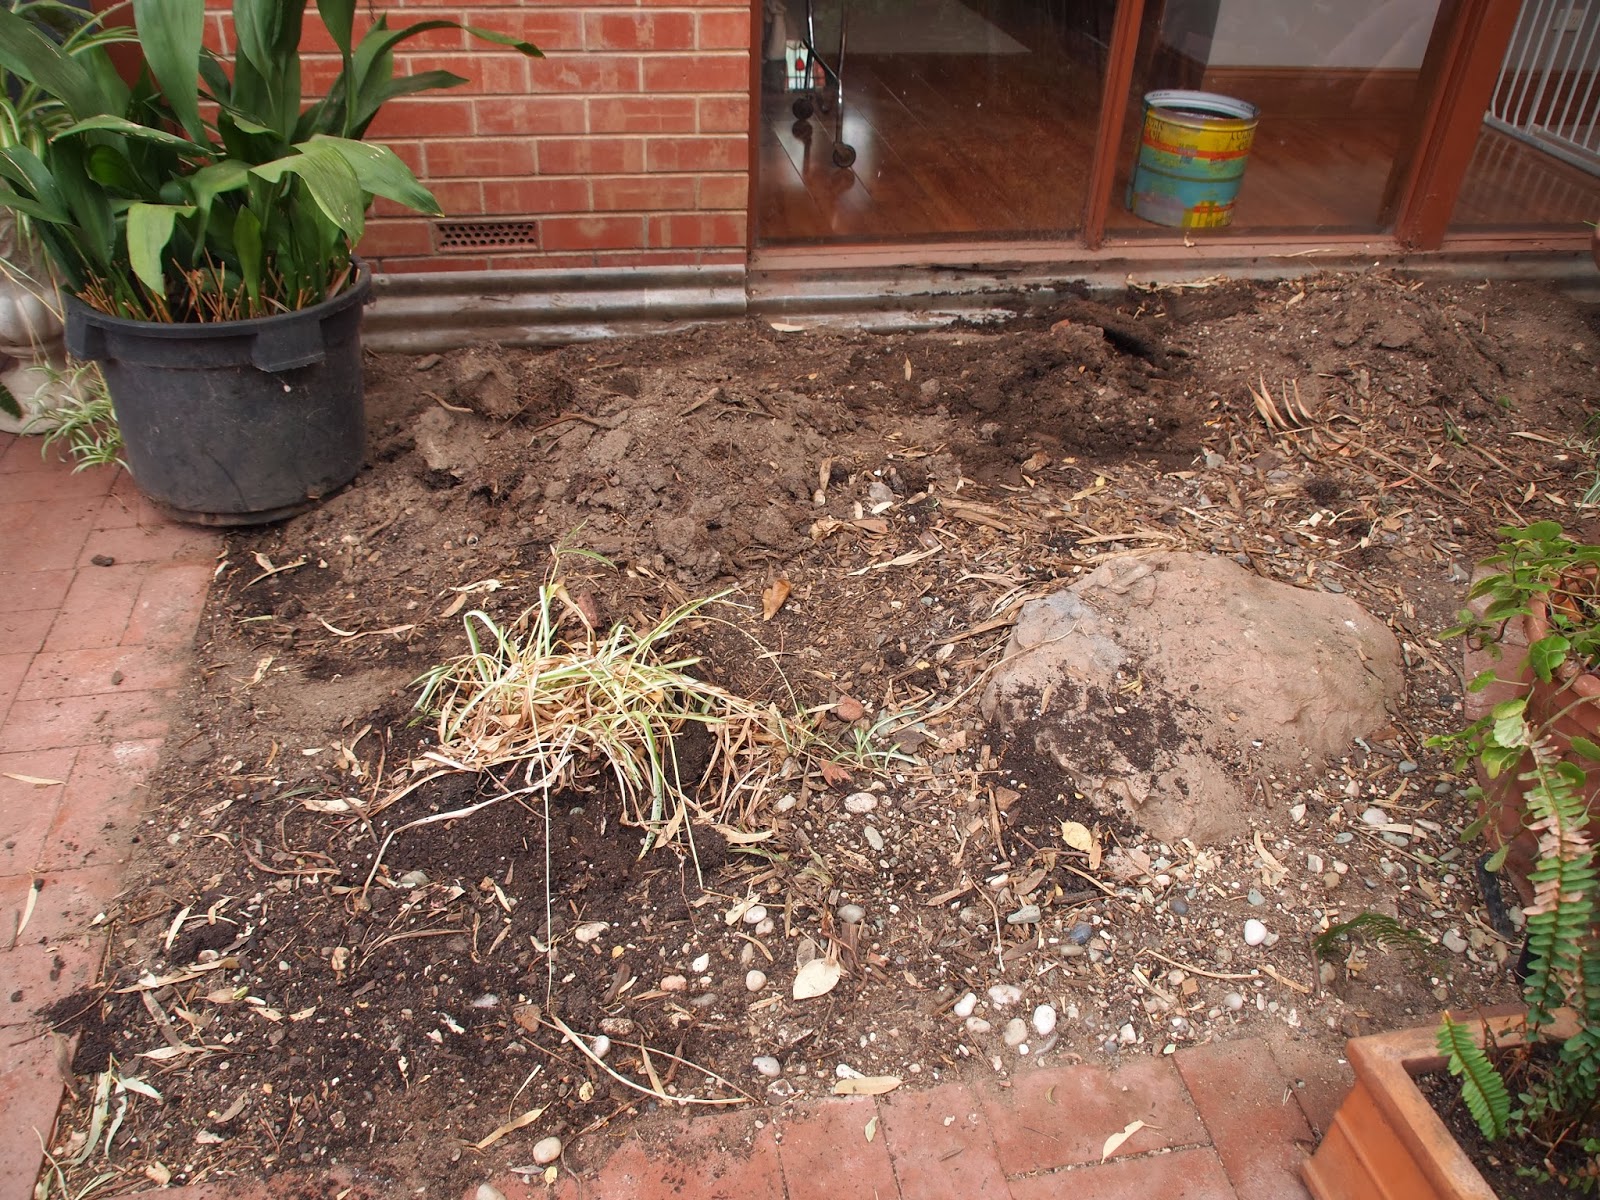
As you can see it was pretty much a mess of dirt and a whole bunch of pot plants. For a while now I'd being looking out the window dreaming of some plants in the ground and a whole lot less pots. On Saturday it was time to tackle the project. To begin with we leveled the dirt (which involved taking about 4 wheelbarrow loads of dirt) and made a layer of bricks along the edge(  as extra water protection even though the atrium was already lined with plastic). Then it came to the planting which was pretty easy. We choose to plant all the plants in the grown except the bamboo which we kept in a pot as we had no idea how big it could grow if not in the pot.
For now the plants all look a bit small but with some water they should hopefully grow and fill out the area a bit more. We also had to call a mate in to remove the large rock (in second picture) but it's much nicer without it. In fact when we bought the place, there were three large rocks but we'd already removed the other two.

There is still a long way to go but it's already looking so much neater and cleaner. If you're wondering where our striped chairs are hiding, they had to have a wash after a giant wind storm a few nights earlier.
The only grass we have is Maisy's little patch so I'm thinking of planting a patch of fake grass with a few pavers through it (the grass would be in front of the plants). I'm also thinking about some hanging plants and putting up the swinging chair in the corner. I'm going to try my luck at selling about 20 or so pots that were in the area and use this as my budget for phase 2 of the atrium makeover. Also if you're wondering about the random upside down pot, it's being used to stop us falling over some metal things that need to be cut away. That's also on the to do list :-) ooo and some outdoor fairy lights of course.
It's time to do some dreaming, planning and hopefully selling.
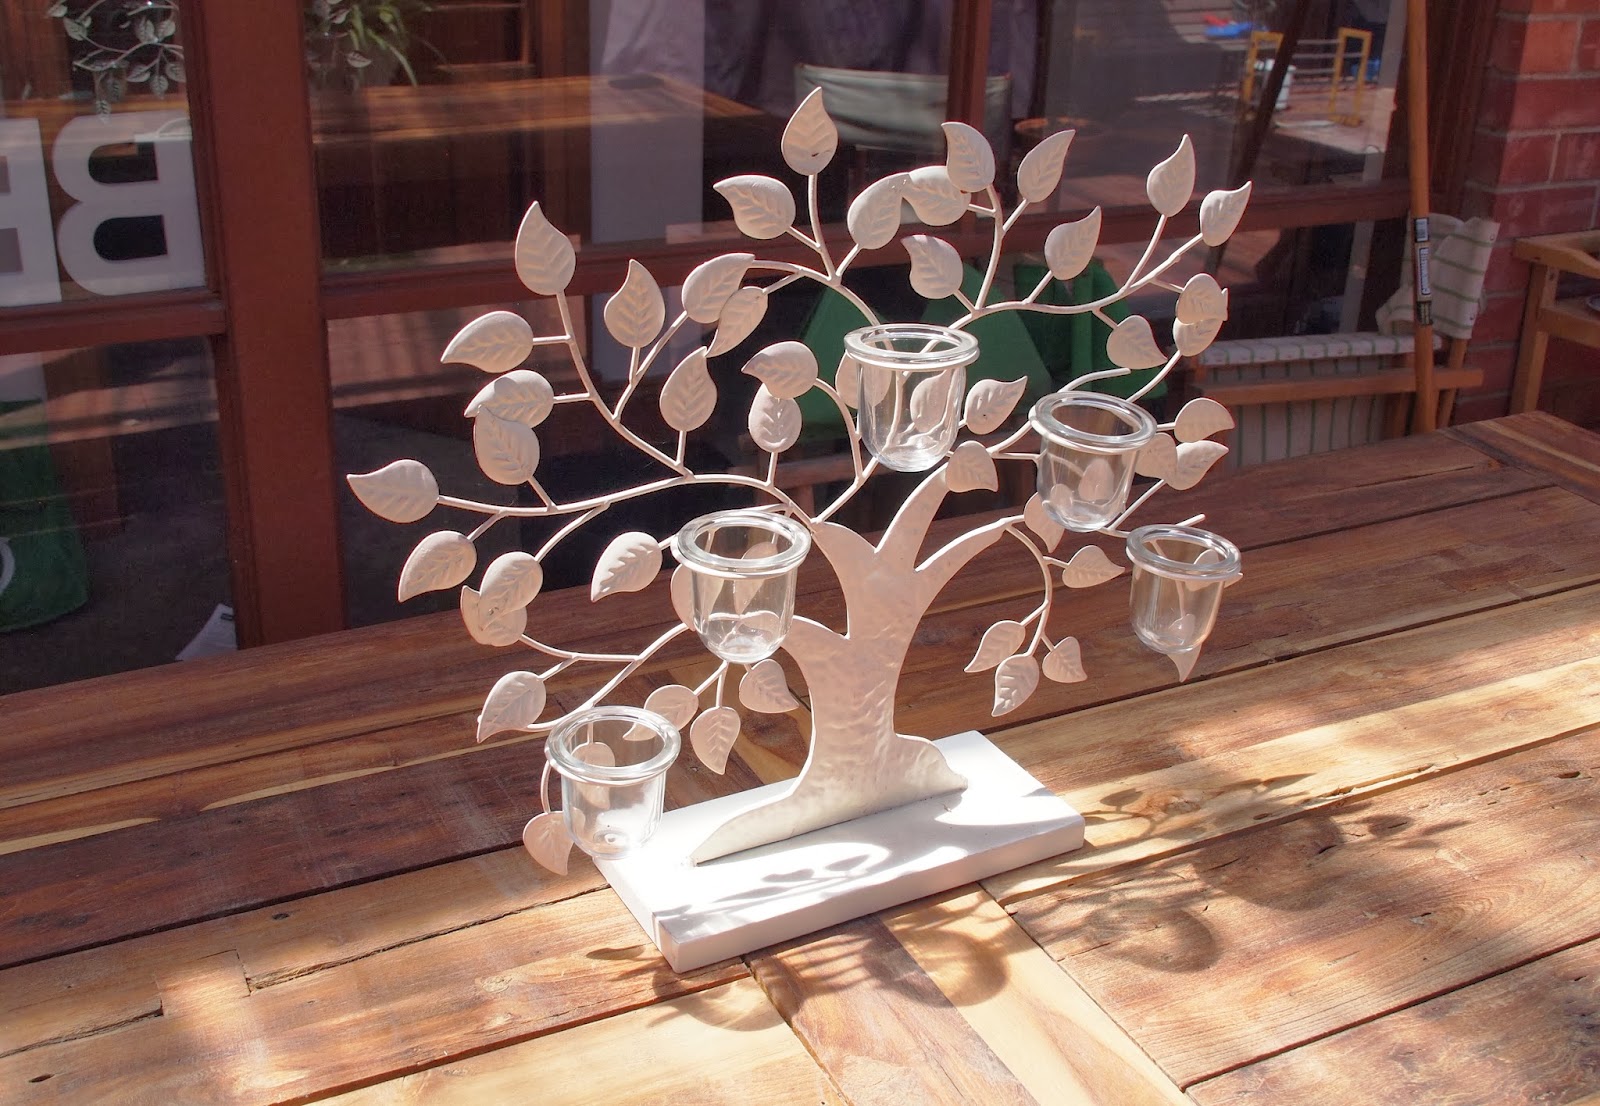
I just found this beautiful candle tree on hard rubbish on my way to the grocery store for the table so here's hoping that I find lots of thrifted beauties. Do you have any suggestions for the space?
Lisa x

Sunday, 20 October 2013

Cute ways to display plants.

It's no secret that I love having plants around. I think that extra bit of green just makes a space. In our first house we had some plants growing inside too but now our new home is built around an atrium, I just looking at the plants outside from pretty much anywhere inside the house. 

Idea 1: put the plant in a birdcage and hang it up.

I thrifted this cute little birdcage earlier in the year at a garage sale and I just love looking out the window from my craft room and seeing it hanging in the atrium with greens bursting from it! If you're having trouble thrifting a birdcage, I know lots of the cheap shops sell cute ones for not too much.

Idea 2: put the plant in a teapot (with a hole drilled in the bottom).
There seem to be teapots at almost every garage sale so they are super easy to buy for a few dollars. When buying teapots for the garden (I have a few around my garden now), I look for the ones with a little chip here and there that are still beautiful... it's just I don't mind drilling a hole in it.I learnt my lesson a few years back when I bought this gorgeous teapot for a dollar, drilled a hole in the bottom, planted a plant and then saw the teapot selling on ebay for $250!
Idea 3: Paint up some terracotta pots.


The old owners of how house left behind a few terracotta pots and I knew I could make them a little bit more appealing. While the paint was out to paint another wall 'silver dollar' by taubmans, I quickly gave the pots a few coats. To finish it off I free handed some zigzag patterns using a white paint pen. Easy and effective. We got given a few packets of basil seedlings as a free gift with a purchase so I've planted them in these pots and hopefully in a few weeks, I'll see growth and have some yummy basil to use with cooking. After all the best kind of plants are the ones you can eat!
 
Lisa x

P.S If your keen to start getting more into gardening, the people at access hydroponic are offering 10% off for all readers.

 Get 10% off sitewide when you shop at Access Hydroponic Valid until November 2013.

Wednesday, 2 October 2013

Dog proofing.

It's been a bit of a challenge to make our new home fit for our little dog. After living in the country for her whole life, Maisy now had to get used to having a smaller space and no grass :(. It was time for some doggy DIY projects. It's so important for us that she is settled and feels at home in our new house so we had to fork out some money and do some DIY projects to see what could make her feel more comfortable in the new environment.
A fake grass patch
After looking around I found that most were a good two hundred or so dollars but eventually found one for $99.She is starting to use it more and more. It has a base that can be emptied on the bottom and can be hosed down too. Since we haven't decided exactly what to do with the atrium, it's the perfect short term solution.( I love the bench the old owners left behind too and got a new outdoor pillow for the hanging chair- which isn't hanging yet - thanks to a welcome to the neighbourhood voucher).

 A doggy door
Before
Our new house has a cat door but Maisy soon broke it after trying to squeeze herself through it too many times. It was hilarious to watch but definite proof that our dog needed her own door.  For $100 I'm sure she'll enjoy her new larger door. It actually ended up taking a good half a day to put in as the door might not look it but it weighed a tonne! Also the wood was very thick and a few jigsaw blades were broken in the process :( but with the help of Grandpa and Dad it was eventually completed.
A safety gate
We live only a few houses away from a busy main room so it was crucial to us that Maisy couldn't escape and run down the street whenever vistiors come over. I bought an extra wide perma safety gate and then a 10 cm extension for about $70 to make it fit across the hallway that connects to the front door. This is actually an extremely easy DIY project, I did it all myself in about 10 minutes so anyone could put up one of these safety gates. I always love a DIY project where I don't need to call in help! You can see the end product in the top left corner of the photo of the fake grass.

A happy dog makes for happy owners. Now, if only I could train her to use the fake grass patch all the time!
Lisa x

Monday, 23 September 2013

Atrium dreaming.

The new house has an amazing atrium that all the other rooms are built around and I really want to make it an amazing focal point and have been thinking a lot about how to make the garden stand out. I want my garden to be amazing and look good all year round. 
I've been thinking lots about how to achieve this and have decided there are 5 things I'm going to focus on.

1) Create landscapes
One of the most important elements of gardening is creating focal points. These are areas of the garden which naturally draw the eye. Small hills, rockeries and ponds are all suitable focal points for modest-sized gardens. Larger gardens might be stepped, creating two different levels, or low-bush planting might be used to disrupt the straight horizon.

2) Add Ornaments
Another way to make your garden amazing is to use ornaments. These might include large features, such as fountains and water features, or they might be something as simple as an ordinary bird bath. From what I've read it's best to position the ornaments carefully, for example curve the viewer's eye around the whole of the garden by adding flower beds and curved pathways which head towards the ornament. I have a beautiful owl currently living in my front yard but this one from yescomusa is pretty darn cute too. Anyone else a bit obsessed with ceramic animals?


3) Add Structures

Good structures can also help to draw the eye around the garden. We are so lucky to have a beautiful atrium already made but  otherwise gazebos are a great idea for those summer parties. I'm thinking one might be perfect near the outside plunge pool if we have any big summer parties. I'm loving this warm spring weather at the moment. Gazebos are more attractive than practical, but are the ideal location for summer parties or space alone. These items are very easy to maintain, and it is possible to buy  a gazebo canopy replacement.

4) Add Definition
In gardening, the key to definition is having the visitor travel around the garden. This can be done physically, with the planting of trees and bushes designed to encourage the visitor to walk along a path, or it can be done using items such as the atrium above, and also through the use of arches, fences and tunnels. We've already got some glass fencing but I'm thinking of adding  an arch as a canvas for climbing plants such as roses and ivy... I already miss the beautiful roses that filled our old yard.

5) Add Garden Furniture 
Finally every garden needs good garden  furniture. While this can be the traditional wicker or iron chairs and tables, there are also sofas, arm chairs or bench seats are designed to be used in the garden. Fire pits are also popular, allowing gardeners to sit outside for longer, while enjoying the heat and color of the flames. Before the move I got rid of most of our outdoor furniture so we could start fresh but the old owners left behind a cute little garden setting (kind of similar to the picture below) which is currently in the atrium. It's perfect for a little tea party so I'll most definitely be keeping it but I am thinking of investing in a lovely large iron or wooden outdoor table. Most of these types of garden furniture need to be properly protected from damage including wind and rain, and also animals. Prevention is better than cure, and protecting your garden furniture might include steps such as buying a gazebo canopy replacement from www.yescomusa.com.

I can't wait to set up the atrium and share it with all of you.
Lisa x
P.s This post was sponspored by www.yescomusa.com but all the opinions in it are mine.

Saturday, 1 June 2013

How to Begin Indoor Growing

I love a bit of greenery indoors and have been slowly growing more and more plants inside.
You can grow so much variety of plant life these days indoors. It’s remarkable. And more than just being cool, it could well mean you grow your own food right in your house.
You can grow all sorts of things, it’s true, but first you’re going to need to get some stuff, like  led grow lights
and the ballasts and the grow tents and other things you’re going to want.
grow lights

grow tent
The led grow lights at the la shop  are extremely awesome.
Plants don’t just grow inside by themselves, they require nutrients and simulated sunlight.  Newsflash, plants need sun! When starting an indoor garden it's best to start with just a few tomatoes and some spices.  Then you can make an amazing pizza with  the ingredients your grew yourself, in the basement. It is an invaluable experience and also it gives the grower an exceptional sense of accomplishment, I love homegrown goodness. Mmm pizza with homegrown ingredients is just the best.
Then you can soon thereafter begin experimenting with other recipes, and grow more foods and produce which in term expanded our culinary options.
Having an indoor garden is the best idea and it can keep going despite the weather.
After all, I want to be able to grow my own food and know what I’m doing.  The principles gleaned with an indoor garden will be invaluable.  Anything that keeps me indoors and still growing amazing food is so good!
Lisa x
P.S This is a sponsored post from the LA shop and their amazing gardening goodies. Check them out.

Saturday, 18 May 2013

Class garden.

I am a big fan of using recycled objects in my garden. I just love teapots and have started growing some seedlings in an old broken tea pot.I am also a JP teacher and when we were asked to create a recycled garden in our school courtyard, I really wanted all the kids to use cans. The only problem was that the sharp edges of cans could cut the kids.Solution: On a local buy and swap website I found someone selling a tupperware can opener for $5 secondhand ( they usual retail for $60) and was amazed that when I used it, no more sharp edges!


Okay so I've actually gone way can mad at my house... I've even been eating meals that use food from cans just so I can collect more to make some cute as pencil tins in my classroom... chilli con carne seems a winner as it uses 2 cans of tomatoes and a can of kidney beans :)
*We painted the pots with acrylic paints and then I covered them with a vanish to seal in the colour.
We have also decorated a whole bunch of stones for the courtyard which are so cute and colourful. We used lots of coloured paint, vanish and then attached shells for extra interest. At the moment the seedlings are still growing but I'll share another photo when the courtyard is complete. One of my students liked it so much she went home and made me a beautiful colourful stone for my yard. It makes me smile everytime I walk past.
Do any of you lovely readers have any other good, cheap gardening ideas to do with kids?

Thursday, 11 October 2012

Lessons from my grandma.


I shared what I learnt about growing vegetables from my grandpa and thought I better share some things learnt from grandma too since she's also incredibly skilled and I'm always keen to learn from her.
I had a hideous old cord skirt which I decided to cut up and turn into my first wheatbag. This has been a project that was started way back in July before my sewing machine needle broke and machine stopped working properly.
Thankfully Grandma helped me learn how to work a different machine while I sent off my machine to get repaired. Didn't you already make a hot water bottle cover from old jumpers you ask? I'm a sucker for instant warmth rather than warmth which lasts the night but doesn't quite perfectly wrap around your feet. Hot water bottles are great and all but really I'm a wheatbag lover at heart.
I know it's already starting to feel like summer as I finally share my completed wheatbag but it's all ready for next winter and for those people who live on the other side of the world, here's a tutorial for soon, as I know it's starting to get colder over there.

You need:
Wheat
Material ( I cut up an old cord skirt for material and then used some leftovers)
A sewing machine
A funnel
Needle and thread

How to:
Cut the material into a rectangle shape and fold in half. You can make a wheatbag any size you like.
Fold it so the good side is on the inside and sew around the edge leaving a small gap so you can material around the right way.
Use a funnel to get the wheat into the hole (you should fill it up just over 1/2 full) and sew closed using a basic blanket stitch.
And them you'll have your own wheatbag.

 I had some wheat leftover and decided to make another one using pretty deer print material.
Now I have a wheatbag for me and one for any visitors we get during winter. I am thinking of making a few more to give as presents and one to leave at mum's house for when I stay there.

Grandma also suggested I made some homemade potpourri with the abundance of rose petals I have (we have a lot of roses out the front).
Potpourri is extremely simple and I really do love the smell, especially as a nice touch in the guest room and lounge room.

You will need:
Dried flower petals ( I used our rose petals obviously and a few lavender flowers from mum)
Dried leaves from plants ( I used lavender, mint and rosemary leaves since the neighbours had these)
You can collect other things to and dry them like orange peel and small pine cones but these weren't avaliable to me at the time.

How to: 
Dry the flower petals, leaves and other times on trays. Make sure they're spread out and not on top of each other. It took about 3 days for the leaves to dry.
Then I added a few broken cinnamon sticks, whole cloves and whole allspice (bought from the supermarket).
I mixed all the items together in a large bowl.
Display in an open bowl, jar, vase or sachets.
In total this project cost me hardly anything and has left me with a sweet smelling home.
Above is a jar full of sweet smells :) I think I will sew some little sachets too and put them in the drawers to keep them smelling fresh.
Grandparents are just so special and I'm so glad I've had this chance to learn from them and spend such quality time with them. I will always treasure my time with them.
I'm so thankful for this visit!
Lisa x


Ohsoamelia

Saturday, 6 October 2012

Lessons from my grandpa.


I've just had my parents and grandparents staying at my home for the last few days and it's been so good. I lost my pa about 1 year ago and have a greater appreciation of every time I get to hang out with grandma and grandpa.
While visiting grandparents for tea is great, it is truly special to be able to have your grandparents stay in your home and spend some real quality time with them. 
I am so grateful that they enjoy visiting (this is their third visit) and I am so thankful to be their grand daughter.
my grandpa, the gardener
I've previously shared my little edible garden attempts and homegrown lettuce but have decided to get down to business even more. My grandpa was excited to teach me about starting my own vegetable garden.
At present I had coriander, parsley, basil, spring onions, celery, lettuce and strawberries and now I can report that I've got a whole little garden on the go.
I've recently planted pok choi, baby spinach, rocket, tomatoes, cucumber, capsicum and onions.
I am so excited at the possibility of actually eating from my garden and hopefully next time my grandparents come to visit, I can delight them with vegetables straight from my crop.
If you're thinking of planting cucumber, here's what my grandpa suggests :
- find a nice sunny spot
- add some potting mix to the soil and then soak in water
- dig little holes and plant each cucumber plant
- water a lot but don't water the leaves
- cover with cardboard boxes for the first few days (especially if you live in a town as sunny as mine), I've also put a rock on top as it's quite windy.
Grandma got snap happy while we planted some cucumber...


I'm so excited to see what happens but here's how my little cucumber plants are currently looking:


I'm really looking forward to seeing how the cucumber goes and if I have any success. I've also set up a little dripper system for when we go away/ incase I forget to water them.
What vegies do you grow? 
Lisa x

Wednesday, 3 October 2012

Let us grow lettuce.

I must confess, I often ended up having frozen vegies and carrots with my tea as I'm constantly running out of lettuce for salads. Lettuce isn't expensive but it doesn't last that long and we eat it quite fast. Inspired by my first successes with growing my own edible garden (as now I have more parsley and spring onion than I need)  I've decided to take the obvious route and grow my own lettuce.
Tasty lettuce at my finger tips all the time! Perfect!
I thought I'd share a sure way to grow your own lettuce that has worked successfully for me.
You will need :
Lettuce seeds
Newspaper
Lots of water
Potting mix
An old wheely trolley ( I like the move my lettuce round)
A styrophone box ( I got it for free from my local supermarket- you just need to ask)

How to:
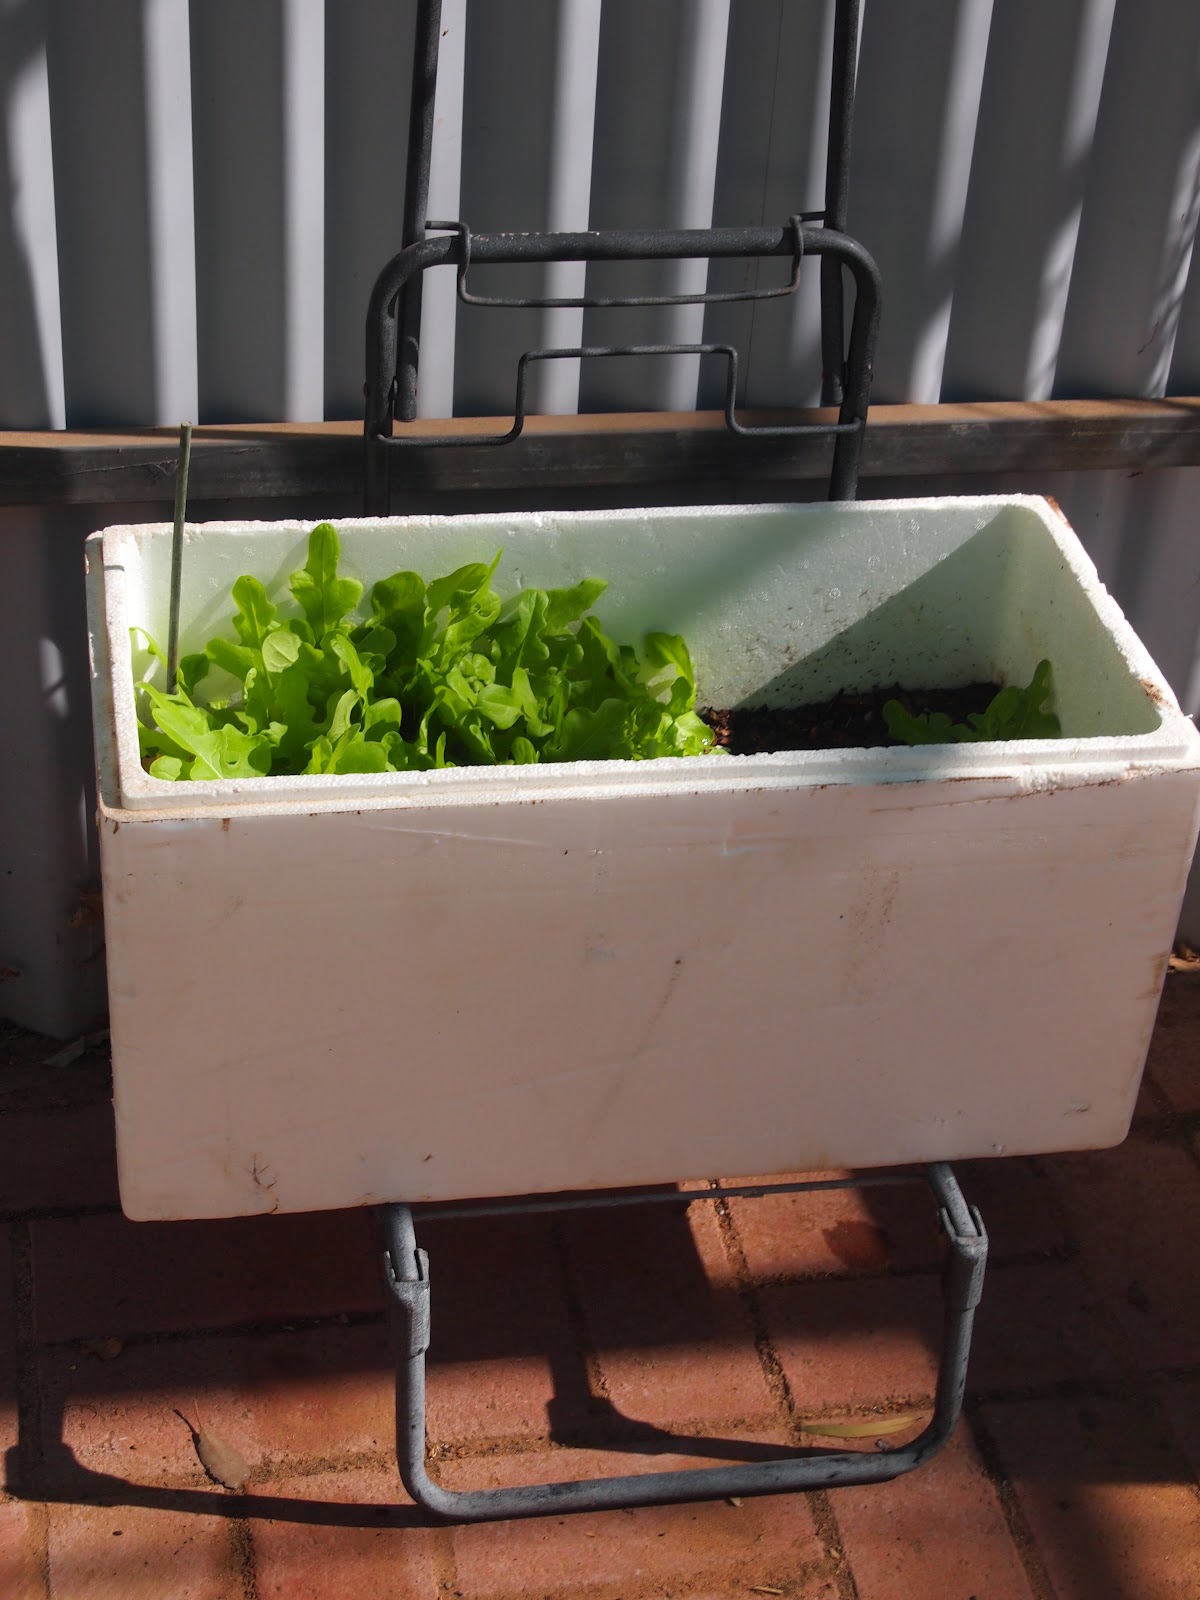
First place the styrophone box on an old wheely trolley and fill the styrophone box with some potting mix.
Soak water through the potting mix and wait a few hours.
Then plant the lettuce seeds in two rows.
Cover with newspaper.
Water daily and before you know it your lettuce will be growing and thriving.
Check out my lovely lettuce...

Mine will be ready to eat in about a week and then I'll be eating salad galore!

Lisa x

Monday, 17 September 2012

The beginnings of an edible garden.

source
I  live on a large enough block in a country town. It was only a matter of time before I knew I had to get into growing some of my own food. 
There's nothing quite like fresh food straight from your yard. I'm currently blessed by having some friends who will trade an egg carton for a dozen eggs. I've got a constant supply of oranges for snacks and fresh juice. My neighbours always leave me spinach and parsley and there's a large quandong tree which hangs into my yard and provides plenty for pies and chutneys.

What's a quandong you say? See above...
It's a native Australia peach that tastes amazing when it's cooked into pies, chutneys or made into jam.
So I feel pretty blessed with homegrown food; eggs, oranges, parsley, spinach and quandongs.

However I've been feeling the urge to have a try growing a few of my own edible plants and have started the process. Here's how I've started:
Mum gifted me some basil and parsley plants and I planted some coriander seeds a friend gave me.


I've also planted some strawberry plants husband was gifted as a thank you gift from a patient.  I love the idea of using an old crate around a pot to make it look all that more charming. This wooden crate was thrifted from a garage sale.

I replanted the end of some store bought celery and according to pinterest it should regrow. Only time will tell :) It's started to regrow but I am still a little skeptical about how much it will grow.


I put the ends of store bought spring onions in water and they have already started to resprout. I have also planted some of  them and will see whether they grow more. I think old thrifted teapots make the cutest pots, all you need to do is drill some holes in the bottom for drainage and put a plate underneath * I forgot to replace the plate before taking the photo.

For now I'm just starting to green my thumb. I'll let you know how my mini crops go :) Do you have any tips that have worked for you to cultivate your own little edible patch?
Lisa x